Showing posts with label A Trio of. Show all posts

Sunday, December 18, 2011

A Trio of: Party Snacks. Brigadeiro (Brazilian Chocolate Caramels)

 ...A rather delightful, but ill-defined confection. Is it a caramel? Is it chocolate? Is it a truffle? Don't trifle yourself with these questions! Just make and enjoy. My camera does not do these little candies justice, they look like little jewels when the light hits them.

I'm also classifying this as an ingredient elimination recipe, with the feature ingredient, sweetened condensed milk. I had a small amount of condensed milk from my sweet potato pecan pie and was looking for something to do with it. I stumbled upon Brigadeiro, first on the blog Las Vegas Food Adventures, but I found the recipe duplicated verbatim many other places, so I don't know who gets credit for it! The original doesn't call for the cocoa to be sifted, nor does it include the salt or liquor. I was so happy with the outcome, that I made a full size batch, then another, and other for a Christmas party I was hosting.


Brigadeiro (makes about 20 candies)
  • 1 can sweetened condensed milk
  • 3 Tbsp cocoa powder, sifted
  • 1 Tbsp butter, softened
  • 1/2 shot liquor of choice (I used peppermint schnapps, vanilla rum, and Irish cream in different batches)
  • pinch salt 
  • butter
  • red or green sugar, or chocolate sprinkles, for coating 
  • mini-candy cups 
1. Combine the condensed milk, cocoa powder, butter, liquor and salt in a heavy bottom saucepan using medium low heat. Initially, stir constantly and vigorously, incorporating the ingredients well.
2. Continue stirring frequently, for about 12 mins, making sure the chocolate doesn't stick or burn. At about the 12 min point, the chocolate should begin to thicken. 
3. Remove from heat, cool (I just put mine out on the porch, it was a cold day). Once cool and easily molded, it's ready to be formed into candies. 
4. Assemble several baking cups. Thoroughly butter your hands to prevent the candy from sticking. Roll into small balls (about 1/2 inch) and roll in the sugar, and place into cups. Keep refrigerated until ready to serve. 


Kitchen Notes: Getting these to the right consistency can be tricky. If after you've cooled the chocolate it still cannot form into balls, heat the mixture on the stove for a few more mins until you get the desired consistency. You'll want to use a good quality cocoa powder as there's not much else in this recipe.

Verdict? A very easy, very delightful treat, with a lot of versatility. They have a rich chocolatey flavor and mild caramel flavor. They are smooth but chewy. These little candies are so beautifully festive looking, enjoy!

Sunday, December 11, 2011

A Trio of: Party Snacks. Oven-Fried Cajun Chickpeas

 This recipe comes with 2 warnings: 1) Prepare to become addicted to this tiny treats; 2) Symptoms of this addiction include a tongue made raw by crunchy chickpea bits and cajun heat, AKA a condition known as "Cap'n Crunch Tongue".

I've been quiet with blogging as I've been busy preparing for a Christmas party that we hosted last night. Since (ehem!) I had to focus so many efforts on housecleaning, I wanted to enjoy experimenting with simple, yummy party foods.

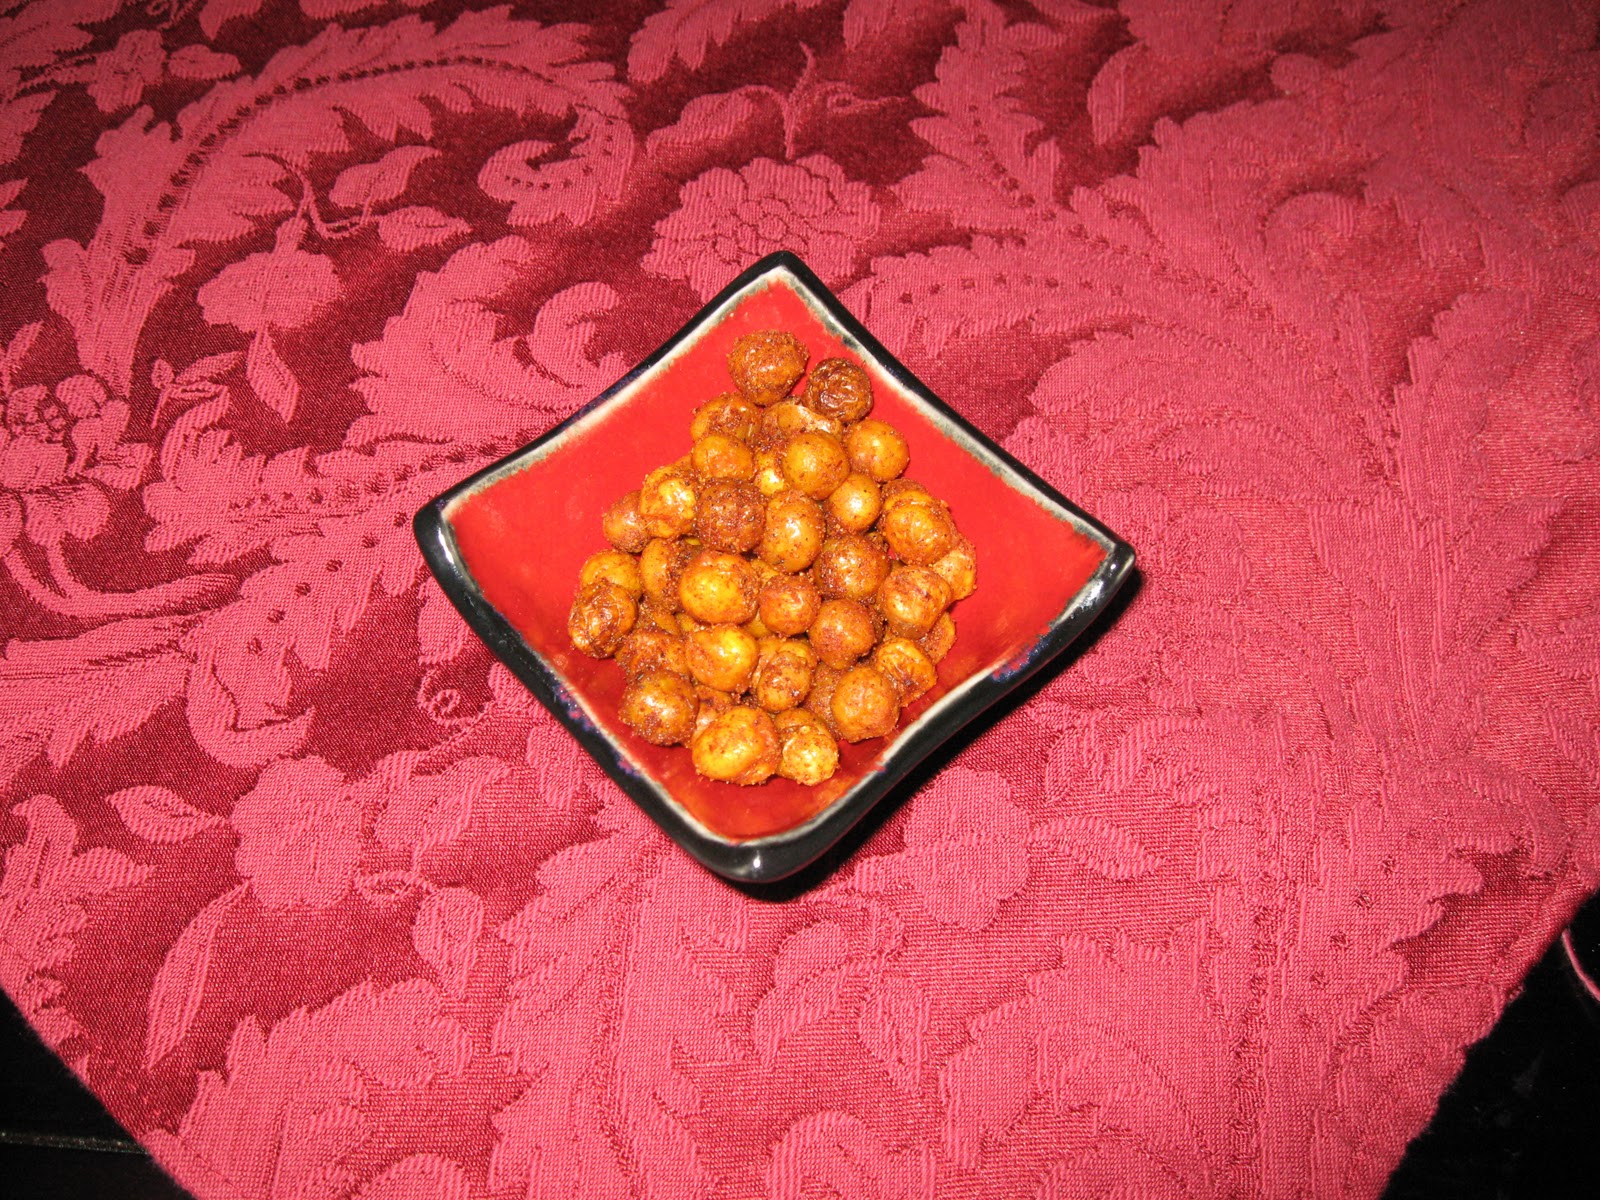
Two restaurants in town feature a little fried chickpea appetizer, both featuring smoky paprika seasoning. The fried chickpeas at Radio Maria and Carmon's Bistro for me, frequently overshadow the main course. After reading a lot of reviews that fried chickpeas made an easy, crowd pleasing appetizer, I figured I'd give it a go. Since every recipe I looked up stated they needed to be made more or less immediately before serving, and I didn't want to mess with frying oil in a party dress, I looked for an alternative. Steamy Kitchen offered up this recipe, which I followed more or less as directed. As an added benefit, I got to use my new bottle of Dinosaur Bar-B-Que Cajun Foreplay Spice Rub and a new baking pan designed to make oven fried foods crispier. Here are pictures of them:

And the pan:


Cajun Oven-Fried Chickpeas
  • 2 cans chickpeas
  • 1 Tbsp olive oil
  • Cajun seasoning, or other spice blend to taste (I used 2-3 Tbsp)
  • salt to taste
1. Preheat the oven to 400, 325 if using convection. Rinse and drain the chickpeas.
2. Line a baking pan with paper towels. Pour the drained chickpeas on the towel in single layer and place a paper towel on top. Let sit for 10 mins.
3. After 10 mins, rub the palm on your hand on the top paper towel to remove the outer skins of the chickpeas. Discard the skins that remove easily.
4. Dispose of paper towels. Pour chickpeas in a bowl. Add the olive oil, and stir until the chickpeas are well coated. 
5. Return the chickpeas back to the baking pan in a single layer. Cook for 20 mins, stir. Cook for about 20 mins more, or until chickpeas are crispy.
6. Pour chickpeas in a bowl, gradually adding/mixing in salt and seasoning to desired flavor. Serve immediately. 

Kitchen Notes: These will store for a day or so, but some crispness is lost. I think these would be excellent on a salad.
Verdict? It's a good thing that this blog is written, rather than spoken since my tongue is so sore from eating too many of these. These are almost as good as the fried ones, but easier to make, and possibly healthier. I'm really excited to make these again and again and I think they'll be a fabulous substitute for a lot of commercial salty snacks.


Saturday, September 17, 2011

Ingredient Elimination & A Trio of: Savory Pecans

To close out my trio of roasted nuts, I break both my pattern of baking with almonds seasoned like hot beverages (see my previous posts for Chai Almonds and Hot Cocoa Almonds) and switch to pecans with a savory slant. In addition, I used my last egg white. Hurrah!

                                                        Packed up for a dinner party!

This recipe is modified from Moosewood Restaurant New Classics. I tried the original recipe and was greeted with failure, the nuts burned, and had little flavor. With modifications it's a great bar snack. Enjoy!

Savory Pecans (makes 2 C)
  • 2 C raw pecans
  • 1 egg white
  • 2 Tbsp Worcestershire sauce (I use a vegetarian version--see kitchen note below)
  • 2-3 tsp Old Bay seasoning
  • 1/2 tsp garlic powder
  • 1/2 tsp chili powder
1. Preheat the oven to 350 degrees. Mix together the Worcestershire sauce, Old Bay seasoning, garlic powder, and chili powder until it forms a paste.
2. In a separate bowl, lightly froth the egg white with a fork. Mix together with the Worcestershire sauce paste until combined.
3. Pour the mixture over the pecans and stir until the nuts are well coated.
4. Place the nuts on a lightly greased baking sheet in a single layer. Bake for 10 minutes, stir. Bake for another 5-10 minutes. Do not allow the coating to burn.

Kitchen Notes: The original recipe calls for mixed nuts, but from experience the pecans especially shine in this recipe, so I prefer to use them exclusively. The original recipe also calls for a greater amount of Worcestershire sauce and a lesser amount of Old Bay. The veggie Worcestershire sauce I use is Wizard's brand, and I've always been happy with it. I've included a photo below.


Verdict? I love the flavor of Old Bay, so I'm partial to these. As you can gather from the ingredient list, these are very salty but have a great flavor, and probably are no worse for you then commercially available salted nuts. Give them a try, and add seasonings that you adore.


Tuesday, September 13, 2011

Ingredient Elimination & A Trio of: Chai Almonds

Here's my second installment in my trio of roasted nuts and my second attempt at getting rid of egg whites. I wanted to make a sugared almond with a little something extra. For this, I took a basic sugared almond recipe and added the seasoning from a Chai tea recipe from Sundays at Moosewood Restaurant. I was pleased with the result. Just a reminder, the first installment was hot cocoa almonds.
                                                 They smelled as awesome as you'd imagine!

Chai Almonds (Makes 2 C)
  • 2 C raw almonds
  • 1 egg white
  • 1/2 C sugar
  • 1/2 tsp ground cinnamon
  • 1/2 tsp ground ginger
  • 10 ground cardamom pods
  • 1/2 tsp ground black pepper
  • 1/4 tsp ground cloves
  • 1/2 tsp ground coriander seeds
  • pinch salt
1. Preheat the oven to 350. Combine the sugar with all the spices in a small bowl.
2. Lightly froth the egg white. Pour over the almonds and combine until well mixed.
3. Add the sugar mix to the almonds, combine until well-coated.
4. On a lightly greased cookie sheet, spread the almonds into a single layer.
5. Pop in the oven for 10 minutes, then stir. Pop in the oven for another 10 minutes, insuring it doesn't burn. Let cool before serving.
 Verdict? Very yummy twist on sugared almonds. I found that the spices were a bit more subtle than I'd like, so next time I'll bump up the ratio a bit. They are a bit addictive, so watch out!

Sunday, September 11, 2011

Ingredient Elimination & A Trio of: Hot Cocoa Almonds

I've been making sugared almonds for a long time. I can't remember where I initially found a recipe, nor do I ever make them exactly the same way each time, but they are a go-to for me when I need to use up some egg whites.

So,  since I had 3 egg whites from my Grown-Up Dirt Pudding, I decided to make a trio of roasted nuts, starting with Hot Cocoa Almonds, followed by Chai Spiced Almonds, and ending with Savory Pecans. I realized shortly after I planned out these recipes that the 1st two relate to hot beverages, and was disappointed with myself that I didn't transform the pecans into something coffee related, or given the emerging season, hot cider related. Oh well, next time.

Hot Cocoa Almonds (makes 2 C)
  • 2 C raw almonds
  • 1 egg white, lightly beaten
  • 1 tsp vanilla extract
  • 1/2 C sugar
  • 1 Tbsp pure cocoa powder
  • 1 tsp cinnamon
  • pinch salt
1. Preheat the oven to 350 F. Place the almonds in a medium mixing bowl. 
2. In a small bowl, whisk together the egg white and the vanilla extract.
3. In a separate bowl, mix together the sugar, cocoa powder, cinnamon, and salt.
4. Pour the egg mixture over the almonds and mix until well coated.
5. Add the sugar mixture to the almonds and mix until well coated.
6. Lightly spray a baking sheet with oil. Spread the almonds into a single layer on the baking pan.
7. Bake for 10 minutes. Stir, and bake for up to another 5 minutes, watching closely for the last few minutes--these burn easily.
                                      Almonds, sugar mix, and egg whites, ready to go

Kitchen Note: This recipe will only be as good as the cocoa used. I used Dean & Deluca, with good result.


Verdict? I was disappointed with the first bite, but the finish has a strong cocoa flavor that builds as you eat more and more almonds. I was very hesitant to use much cocoa for fear it would burn, but next time I will increase to 1.5 Tbsp. I'm definitely making this again, I'd like to make a spicy version with cayenne, as well as a version with toasted coconut. Yum.
 

Saturday, August 13, 2011

A Trio of....Cucumber Salads, Part III: Korean Spicy Cucumber Salad

 Welcome to part III of cucumber salads! Occasionally I get very ambitious and make the Korean dish bi bim bop. This little salad is a mix in or banchan for this dish. This salad, while delicious, it rather spicy and super garlicky. Just a few slices will do. If you do incorporate it into bi bim bop, the flavors will soften considerably.

This recipe comes from a favorite of mine, the cookbook Dok Suni, by Jenny Kwak and Liz Fried. I would check it out from the library for months at a time. I finally broke down and bought it.


Spicy Korean Cucumber Salad (Oye Moochim) (serves 4 or more)
  • 1 cucumber, prepared as written here 
  • 1 1/2 Tbs red pepper flakes, or more
  • 1 Tbs rice vinegar
  • 1 tsp sesame salt
  • 1 tsp very finely minced garlic
  • 1 tsp sesame oil
  • pinch brown sugar
  • salt
1. Mix together the red pepper flakes, vinegar, sesame salt, garlic, sesame oil, and sugar so that it makes a paste. Combine with the cucumber, Mix thoroughly. Serve chilled. Keeps fresh for a week. Will actually keep longer, but won't taste as yummy.  

                                                 Served with my rescued noodles
Kitchen Notes: I've seen sesame salt defined two ways: 1) a combination of pulverized sesame seeds and salt; 2) Pulverized toasted sesame seeds. Truthfully, this time around I didn't feel up to grinding the sesame seeds, so I omitted it. I've included a graphic of the red pepper flakes below. They are used a lot in Korean cooking. I keep mine refrigerated as they seem to get moldy very fast.

Verdict? Little goes a long way. Strong bite from the garlic. Strong heat from the red pepper. Refreshing cukes. Give it a try.

Monday, August 8, 2011

A Trio of....Cucumber Salads, Part II: Japanese Cucumber Salad

I don't know how long I've been making this recipe. It's another one slightly adapted from Sundays at Moosewood Restaurant. I will tell you, that it's very important to adequately cook the sake used in this recipe. It is not OK to get tipsy off your food. I've learned this from experience.


Are you familiar with the Korean concept of banchan with meals? It's the idea of serving very small side dishes with your meal, almost like an amuse bouche, but served to accompany the meal, not before. Served in this fashion, this works quite well, but by itself, the flavors are overwhelming.

Without further ado, round II of cucumber salads.


Japanese Marinated Cucumbers (Su-no-Mono) with Sake Noodles 
For the cucumbers:
  • 1 large cucumber, prepared as outlined here
  • 1/4 C sake, boiled
  • 1/3 C rice vinegar
  • 3 Tbs soy sauce
  • 2 Tbs mirin
1. Mix the sake, rice vinegar, soy sauce, and miring together. 
2. Add to cucumbers, allow to chill for a couple hours. 

Kitchen Notes: As mentioned above, the flavors in this become very concentrated, it serves better as almost a  relish, garnish or condiment. For a very light meal, this goes well on somein noodles, or as a side for my deconstructed sushi salad, coming up next.

Verdict? Truthfully, I'm not as in love with this salad as I once was. The sake imparts a slightly floral flavor, which is an acquired taste. As a way to flavor other dishes, though, it works great.

Saturday, August 6, 2011

A Trio of....Cucumber Salads, Part I

As much as I harassed my friend Katie for bartering for my tzatziki recipe, she was super generous in sharing her cucumber bounty. I took the opportunity to make 3 international cucumber salads, each which share the same initial prep. The first I'll feature, is a Finnish cucumber salad, that I've taken from Moosewood Restaurant's Sundays at Moosewood Restaurant, with some minor modifications. I've included a photo from the cookbook, to illustrate why I needed to create this blog. I annotate my cookbooks to the point of vandalism:
                                                         See all the pencil marks?

To start the 3 salads, I took 4 very large cukes, peeled them (don't peel them if your peels are nice. If your peels are nice, score them with a fork), and sliced them very thin. I threw them in a colander, sprinkled them liberally with salt, and drained for 20 mins or so. They looked like this:


After they've drained, rinse off the salt. In a clean, lintless tea towel or cloth napkin (you'll need several), place a handful of cukes and wring until you've extracted as much water as possible. Put the cukes in a mixing bowl. Continue until all the cukes have had water removed. As a heads up, the other 2 cucumber salads are Japanese and Korean.

Finnish Cucumber & Dill Salad (serves 4-6)

  • 2 large cucumbers, prepared as detailed above
  • 2/3 C sour cream or plain Greek yogurt (I prefer sour cream, but used yogurt since that's what I had. Avoid fat free--low fat is OK)
  • 1 Tbs vegetable oil
  • 2 1/2 Tbs white vinegar
  • handful of minced fresh dill
  • 1/4 tsp sugar
  • salt & pepper to taste
1. Mix the sour cream or yogurt, oil, vinegar, sugar, dill and pepper together. Keep salt separate for now.
2. Fold into cucumbers.
3. Add salt to taste. 

Kitchen Notes: This tastes best when eaten a few hours after assembled. Try to eat within a day or so, as the flavor diminishes significantly and becomes watery after this. Don't omit the sugar, though it sounds odd. It helps enhance the flavors of the salad and does not create a sweet flavor. I add the salt at the very end, because inevitably some salt remains on the cucumbers after rinsing, so it's hard to gauge how much salt is needed until the salad is assembled.
                                                   It tastes far more attractive than it looks!

Verdict? One of my favorite summer salads, and one I make again, again, and again. Well worth the work, in my view. Very refreshing.