Sunday, December 18, 2011

A Trio of: Party Snacks. Brigadeiro (Brazilian Chocolate Caramels)

 ...A rather delightful, but ill-defined confection. Is it a caramel? Is it chocolate? Is it a truffle? Don't trifle yourself with these questions! Just make and enjoy. My camera does not do these little candies justice, they look like little jewels when the light hits them.

I'm also classifying this as an ingredient elimination recipe, with the feature ingredient, sweetened condensed milk. I had a small amount of condensed milk from my sweet potato pecan pie and was looking for something to do with it. I stumbled upon Brigadeiro, first on the blog Las Vegas Food Adventures, but I found the recipe duplicated verbatim many other places, so I don't know who gets credit for it! The original doesn't call for the cocoa to be sifted, nor does it include the salt or liquor. I was so happy with the outcome, that I made a full size batch, then another, and other for a Christmas party I was hosting.


Brigadeiro (makes about 20 candies)
  • 1 can sweetened condensed milk
  • 3 Tbsp cocoa powder, sifted
  • 1 Tbsp butter, softened
  • 1/2 shot liquor of choice (I used peppermint schnapps, vanilla rum, and Irish cream in different batches)
  • pinch salt 
  • butter
  • red or green sugar, or chocolate sprinkles, for coating 
  • mini-candy cups 
1. Combine the condensed milk, cocoa powder, butter, liquor and salt in a heavy bottom saucepan using medium low heat. Initially, stir constantly and vigorously, incorporating the ingredients well.
2. Continue stirring frequently, for about 12 mins, making sure the chocolate doesn't stick or burn. At about the 12 min point, the chocolate should begin to thicken. 
3. Remove from heat, cool (I just put mine out on the porch, it was a cold day). Once cool and easily molded, it's ready to be formed into candies. 
4. Assemble several baking cups. Thoroughly butter your hands to prevent the candy from sticking. Roll into small balls (about 1/2 inch) and roll in the sugar, and place into cups. Keep refrigerated until ready to serve. 


Kitchen Notes: Getting these to the right consistency can be tricky. If after you've cooled the chocolate it still cannot form into balls, heat the mixture on the stove for a few more mins until you get the desired consistency. You'll want to use a good quality cocoa powder as there's not much else in this recipe.

Verdict? A very easy, very delightful treat, with a lot of versatility. They have a rich chocolatey flavor and mild caramel flavor. They are smooth but chewy. These little candies are so beautifully festive looking, enjoy!

Sunday, December 11, 2011

A Trio of: Party Snacks. Oven-Fried Cajun Chickpeas

 This recipe comes with 2 warnings: 1) Prepare to become addicted to this tiny treats; 2) Symptoms of this addiction include a tongue made raw by crunchy chickpea bits and cajun heat, AKA a condition known as "Cap'n Crunch Tongue".

I've been quiet with blogging as I've been busy preparing for a Christmas party that we hosted last night. Since (ehem!) I had to focus so many efforts on housecleaning, I wanted to enjoy experimenting with simple, yummy party foods.

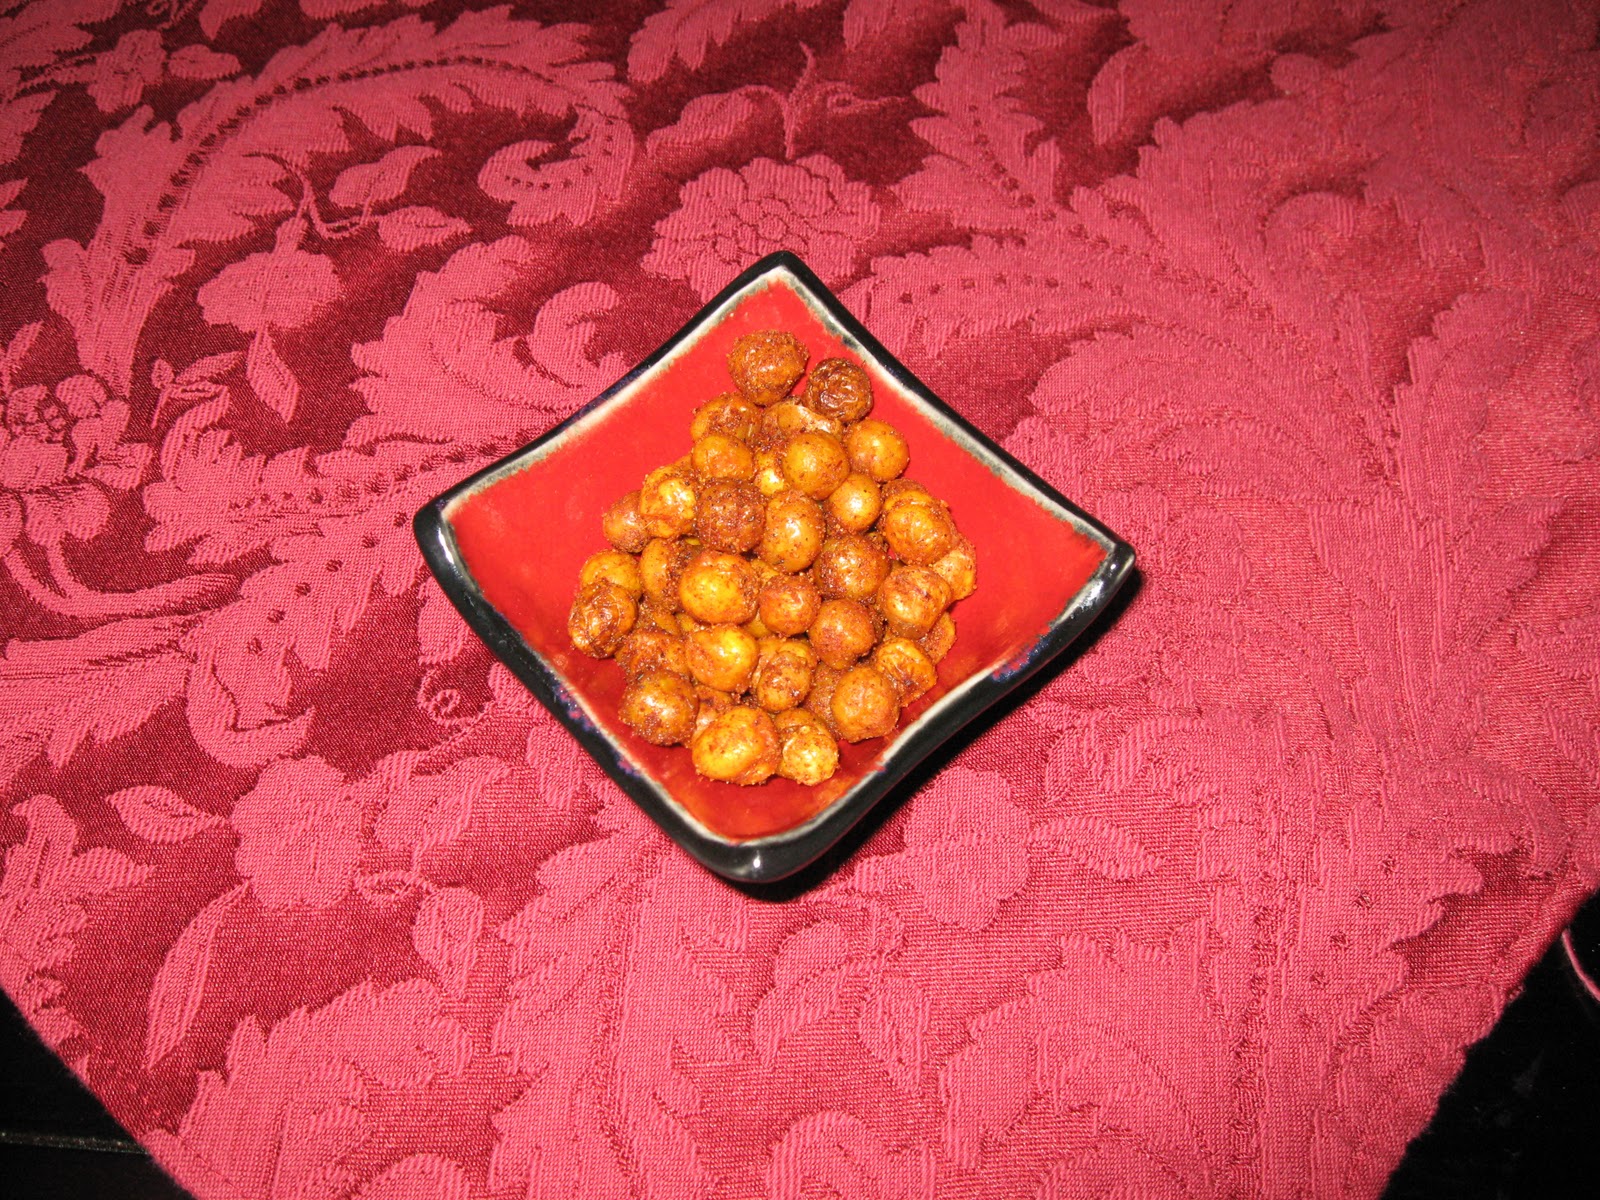
Two restaurants in town feature a little fried chickpea appetizer, both featuring smoky paprika seasoning. The fried chickpeas at Radio Maria and Carmon's Bistro for me, frequently overshadow the main course. After reading a lot of reviews that fried chickpeas made an easy, crowd pleasing appetizer, I figured I'd give it a go. Since every recipe I looked up stated they needed to be made more or less immediately before serving, and I didn't want to mess with frying oil in a party dress, I looked for an alternative. Steamy Kitchen offered up this recipe, which I followed more or less as directed. As an added benefit, I got to use my new bottle of Dinosaur Bar-B-Que Cajun Foreplay Spice Rub and a new baking pan designed to make oven fried foods crispier. Here are pictures of them:

And the pan:


Cajun Oven-Fried Chickpeas
  • 2 cans chickpeas
  • 1 Tbsp olive oil
  • Cajun seasoning, or other spice blend to taste (I used 2-3 Tbsp)
  • salt to taste
1. Preheat the oven to 400, 325 if using convection. Rinse and drain the chickpeas.
2. Line a baking pan with paper towels. Pour the drained chickpeas on the towel in single layer and place a paper towel on top. Let sit for 10 mins.
3. After 10 mins, rub the palm on your hand on the top paper towel to remove the outer skins of the chickpeas. Discard the skins that remove easily.
4. Dispose of paper towels. Pour chickpeas in a bowl. Add the olive oil, and stir until the chickpeas are well coated. 
5. Return the chickpeas back to the baking pan in a single layer. Cook for 20 mins, stir. Cook for about 20 mins more, or until chickpeas are crispy.
6. Pour chickpeas in a bowl, gradually adding/mixing in salt and seasoning to desired flavor. Serve immediately. 

Kitchen Notes: These will store for a day or so, but some crispness is lost. I think these would be excellent on a salad.
Verdict? It's a good thing that this blog is written, rather than spoken since my tongue is so sore from eating too many of these. These are almost as good as the fried ones, but easier to make, and possibly healthier. I'm really excited to make these again and again and I think they'll be a fabulous substitute for a lot of commercial salty snacks.


Sunday, December 4, 2011

Berry Chocolate Turnovers

I'm making these for a Christmas party that I'm hosting. Due to time constraints and a tiny kitchen, I don't want to mess with a lot of ingredients, but I still want to feed my guests, so I thought up this recipe. it's a five ingredient dessert.


In August, I declared a moratorium on puff pastry when I made Apple Turnover Squares, but it's time to lift the ban. It's been a long time since I sang the praises of puff pastry, so I figure I owe it one.

With this recipe, I baked a few as test pastry and I've prepared and frozen the others to be baked next Saturday. This recipe makes a bit more chocolate than you'll need, so have a plan for the extra.

Since it 'tis the season, I listened to Pandora's Indie Holiday station.

Berry Chocolate Turnovers (makes about 8 mini-Turnovers)
  • 1 package puff pastry sheets, thawed (I used Pepperidge Farm)
  • 6 oz semi-sweet chocolate chips
  • 1/2 tsp vanilla extract
  • 1 Tbsp milk
  • good quality berry preserves 
1. Preheat the oven to 400. Roll out the thawed puff pastry, 1 sheet at a time, on a non-stick surface. If it's a rectangular sheet of pastry, lay it so that the long way is left-to-right.  
2. In a double boiler, or in a small saucepan set into a saucepan of boiling water, melt together the chocolate, vanilla extract and milk over medium heat and stir until smooth. When all the chocolate mixture is melted, reduce heat to low and continue to stir occasionally.
3. Cut the puff pastry into 4 2in strips (for a 9 x 9 in sheet of pastry--You'll have a thin strip leftover, be sure to save it to fill in any oozing filling)
4. On each strip, smear a small amount (1/2 tsp) preserves in the center of the bottom of the strip, smearing about 1/4 way up the strip, taking care to avoid the edges.
5. Spoon about 1 scant tsp chocolate mixture in the same pattern as the preserves. 
6. Fold each strip into triangles, pinching around the edges to seal. 
7. Place each triangle on a greased cookie sheet. Bake for 15-20 mins or until golden brown. Serve hot or at room temperature. 

Kitchen Notes: Because this recipe uses so few ingredients, it's important to use decent quality chocolate chips and preserves. I used  3 berry preserve that featured black currants, raspberries and strawberries. If you don't have a double boiler, a small saucepan set into a slightly larger saucepan with boiling water works fine, however, be careful not to 1) splash yourself with the hot water; 2) allow the water to splash in the smaller pan as it will seize your chocolate. This recipe benefits from some photo explanation, so please see below:
                                                                Adding the filling...

                                                               Making triangles...

                                                                          Keep going!

Verdict? Great as a quickie dessert. I love that these are tiny. Since they are very rich, a mini-turnover is the perfect size. Have fun experimenting with different flavors.


Friday, December 2, 2011

Quadruple Onion Holiday Dressing

Disclaimer: Leeks are not technically onions, but they are close relatives. Please allow me poetic license on this one. 


So, here's my last Thanksgiving post, more than a week after the holiday. Fashionably late I suppose. To recap, the Thanksgiving recipes that graced my table and were posted are:  shallot mashed potatoes with mushroom gravy, port cranberry sauce, sweet potato & pecan pie, and chive scones.

I like my Thanksgiving dressing fairly basic. I don't really care much for fruit in my dressings. I've been making this one for a few years now, adapting it a bit each year. It's adapted from The Veggie Table, and they've adapted it from the cookbook The New Vegetarian Epicure. I love how recipes adapt over time.

What did I listen to? Thanksgiving is a bit of a blur, I forgot to document! Oops.

Vegetarian Bread Dressing (serves 8-10)
  • 3/4 C butter
  • 1 C onion, diced
  • 2/3 C leeks, thinly sliced
  • 1/3 C shallot, diced
  • 1 C celery, chopped
  • salt & pepper to taste
  • 3 tsp sage
  • 3tsp thyme
  • 1 tsp marjoram
  • 1 tsp rosemary
  • 3 Tbsp apple cider vinegar
  • 1 medium loaf sourdough, torn into cubes about 1/2 in
  • 1/2 C parsley, minced
  • 1 1/2 C walnuts, lightly toasted
  • 2 C vegetable broth
  • 1/2 C fried onions
1. Preheat the oven to 350. Melt butter over medium high heat. Add the shallots and leeks and saute for about 5 mins. Add the onion, and saute til translucent, about 5-7 more mins. Add the celery, and saute 5 mins more. 
2. Add the salt & pepper to taste, the sage, thyme, marjoram, rosemary and vinegar. Stir well and remove from heat. 
3. In a large casserole dish or roasting pan, add the bread and walnuts and mix together. Pour over the onion mixture and mix well. Drizzle 1 C broth and mix in the parsley.
4. Cover and bake for 45 mins. Check on the dressing every 15 min, adding 1/4 broth each time if needed.
5. After 45 mins, remove cover and sprinkle on the fried onions. Bake for 5 more mins. 


Kitchen Notes: Use stale bread cubes if possible. When reheating, drizzle a bit of broth and to reconstitute a bit.


Verdict? Simple and tasty. Very herbal. Due to the sourdough, this dressing has a pleasant, chewy consistency. Not appropriate for folks who don't care for onions.

Thursday, December 1, 2011

Chive Scones (Don't run away--Yes there's Tofu in these Scones)

Hello! A few weeks back, I made Hungry Couple's pumpkin scones. And then I made them again. Yummy. Here they are for you to see:

I thought that'd I'd like to make a savory scone, and I wanted to serve them for Thanksgiving. Since I was happy with the Hungry Couple's recipe with regards to its consistency, I wanted to use it as a base. I knew that removing the pumpkin from the scone would alter how it baked entirely, so I wanted to figure out something that was a similar texture. I settled on silken tofu, though I also considered sour cream and feta, and I will revisit those another time. Here they are:

Listened to: WTF Podcast. Not very Thanskgiving-y. 

Chive Scones (makes about 9 scones)
  • 2 C AP flour
  • 1 Tbsp baking powder
  • 1 heaping tsp fine salt
  • 1 stick unsalted butter, chilled
  • 1/2 C soft silken tofu
  • 1/4 C milk, plus extra
  • 1/3 C chopped chives
  • 1 egg
  • 1/2 tsp rosemary, partially crushed
  • cracked black pepper, to taste
1. Preheat the oven to 350. In a large bowl, combine the flour, salt, and baking powder. Set aside. 
2. In a medium bowl, combine the tofu, milk, chives, egg, rosemary, and black pepper. Stir until well-mixed and smooth. Set aside.
3. Cut the chilled butter into small pieces. Add to the flour mixture, and using 2 butter knives, cut the butter into the mixture until it forms coarse crumbs.
4. Add the wet ingredients to the dry and mix well. Prepare a lightly oiled baking sheet or sheet with a silpat. With your hands, form the scones. If needed, add a bit more milk to the mixture, though it should be fairly dry.  Place on the baking sheet.
5. Bake for 30-40 mins or until golden brown.

 Kitchen Notes: It's important to get the butter into small pieces, but not so small that the butter melts. If the butter melts, the scones will not have that lovely flaky consistency. If the butter pieces are too big, they won't incorporate into the baking scones but melt everywhere. These scones dry out fast, but are phenomenal the day you make them, and even better fresh out of the oven.

Verdict? Why didn't I try to make savory scones long ago? They are flavorful & biscuity, and will satisfy even the most tofu-phobic friends. The tofu bakes into the scones perfectly and undetected. Enjoy!

Sunday, November 27, 2011

Sweet Potato & Pecan Pie

As I post my Thanksgiving recipes, I figure I should recap what we had this year.
To Drink:
Marinelli's Sparkling Apple Cider

...And Vin Glogg


 To eat:  Port Wine Cranberry Sauce


Quorn roast (for me the veggie), lobster tails (for my husband and a friend of ours, not veggie), Quadruple onion dressing (recipe to be posted soon), shallot mashed potatoes with mushroom gravy, green bean casserole, roasted butternut squash, chive scones (recipe to be posted soon), and sweet potato pecan pie for dessert. Here's the pie:


Unlike all other Thanksgiving food, I don't have a particular nostalgia for any specific desserts. I was thumbing through my Dinosaur Bar-B-Que cookbook, and decided I wanted to make a sweet potato & pecan pie. This also makes the occasion of my first from scratch pie crust but I won't detail that here. I was a bit anxious about it; I'd only have sweet potato pie once before, about 10 years ago, but I was really happy with the results. I followed the recipe verbatim, Dinosaur gets the full credit here, with recipe put in my own words.

Sweet Potato & Pecan Pie (Makes 1 9-in pie)

  • 1 frozen, pastry pie crust 
For the sweet potato filling:
  • 2 C cooked, mashed sweet potato
  • 3/4 C sugar
  • 2 eggs, lightly beaten
  • 1/2 tsp salt
  • 1/4 tsp ground nutmeg
  • 1/2 tsp ground cinnamon
  • 14 tsp ground allspice
  • 1/2 tsp vanilla
  • 2/3 C sweetened condensed milk
For the pecan topping:
  • 1 C coarsely chopped pecans
  • 2 eggs, beaten
  • 2 Tbsp butter, softened
  • 2 tsp vanilla
  • 1/2 C sugar
  • 1/2 dark corn syrup
  • 1/3 tsp salt
  • pinch ground cinnamon
1. Preheat the oven to 325. Get out the crust and pie pan from the freezer. Mix together all the ingredients for the sweet potato filling in a large bowl and combine til smooth, working to get any lumps out of the potatoes. Set aside
2. In a separate bowl, combine all of the ingredients for the pecan topping and stir until well mixed. Pour the sweet potato mixture into the pie crust shell and smooth out the top. Pour on the pecan topping and smooth out the top. 
3. Bake in the oven for 1 1/2 hours until the crust is golden and the filling firm. Serve at room temperature.

Kitchen Notes: This makes a very full pie, mine spilled over the top. The cookbook recommends a slightly larger than usual pie crust and a slightly deeper pie pan--use them if you have them! The only modification I made to the recipe was to add a bit more salt to the pecan mixture, which is captured in my printing of the recipe above. I thought a mild salty taste would complement the pecans well.


Verdict? This hybrid pie is a keeper! The smooth potato filling is an ideal match for the crunchy pecans. I will definitely make a few modifications for my next attempt though. I like more spice in my pie, so I'll add more cinnamon, nutmeg, etc. I'd also prefer for the pecans to be more of an additional layer, rather than a topping, so I will decrease the ratio of potato and increase the ratio of pecans.

Saturday, November 26, 2011

Port Cranberry Sauce

So I am the sorry blogger who posts her Thanksgiving recipes post-Thanksgiving. However, since most of these recipes I only make once a year, I like to give them an additional test run before I upload them.


                     As you can see, I lack fancy bowls. Thus, the sugar bowl springs into action

As much as I get joy from experimenting with new recipes, at heart, I am a traditionalist with Thanksgiving, usually making the same things again and again. I mixed it up a bit this year, including my port cranberry sauce. I found the recipe on Food & Wine's website. I followed it almost exactly, and have printed here in my own words. I did reduce the sugar to suit my preference and reduced the recipe to a 1/3 of its original (we had a cozy 3 person Thanksgiving), so for the original measurements, please check out the original.

I realize it's hard to be excited about cranberry sauce, but I'm a bit of a cranberry snob. My parents are friends with some (former) cranberry farmers, and when I was a kid, one of my favorite places was Ocean Spray's now defunct Cranberry World, mainly because of the free samples.

By the way, this was made while listening to Amy Winehouse

Port Cranberry Sauce (makes about 1 1/2 C)
  • 1/3 C port
  • 2 C cranberries, picked over and rinsed
  • 1/3 C sugar
  • zest of 1 orange
  • pinch salt
1. Bring the port to a boil in a skillet. Add cranberries, and stir frequently, until the berries begin to burst, being careful not to burn yourself.
2. Add sugar, zest, and salt, and stir until dissolved, about 5 mins.
3. Allow to cool and serve at room temperature.


Kitchen Notes: I used Quinta do Chrasto 2005 port which is relatively neutral tasting. The berries burn easily, so be cautious.

Verdict? This is one of the most flavorful cranberry sauces I have had. The port flavor enhances that of the cranberries, and the orange complements without overwhelming. The flavor is highly concentrated. I was concerned about it being too dry, but it was great. I did overcook the berries a bit, making them slightly chewy, but this was my own error and not due to the original recipe.