Showing posts with label snacks. Show all posts

Monday, December 26, 2011

Vegan Week: Vegan Spinach Artichoke Dip

As mentioned in the first post of the current vegan week, I'm having to rely a lot on the recipes of others to make it a success. This is a recipe I tried from Rachel who writes the awesome blog My Naturally Frugal Family. Be sure to check it out. It's a treasure of lots of vegan recipes. She posted this recipe for vegan Spinach-Artichoke Dip, I had to try it to see if it could be done! But first, let's report in on the vegan diet for Thursday, Friday and Saturday (last day):


Thursday:
  • English muffin with spinach-artichoke dip
  • dark chocolate
  • baby carrots
  • barbecued tofu
  • Tortilla soup
  • ginger cookie**
  • coconut cookie**
  • chow mein noodles
  • Drinks: coffee, tea, water, coke, soy nog, red wine 
Friday:
  • Oatmeal, with dried fruit and almonds
  • Tortilla soup 
  • Dark Chocolate
  • Barbecue tofu
  • Gardein strips with mustard & hot sauce 
  • To drink: coffee, tea, water, diet coke 
Saturday:
  • hash browns
  • winter minestrone over pasta
  • barbecue tofu
  • olives
  • Tofu steak entree at local Japanese Restaurant. Included tofu, sauteed veggies, rice, and vegetable maki
  • To drink: Coffee, water, tea, Plum wine
Because of this vegan week, we were able to be more mindful of not overindulging before Christmas. We also felt less guilty of any indulgences we partook in on Christmas Day, though truthfully, we ate fairly light for a holiday.

Well, now on to the fun part. Rachel's kickin' vegan spinach-artichoke dip. This recipe is totally hers, with the smallest of modifications based on what was available to me. Recipe is posted in my own words.

Vegan Spinach Artichoke Dip (makes about 2 C)
  • 1/2 C vegan mayo (I used nayonaise) 
  • 1/2 C silken tofu
  • 1 10-oz package frozen spinach, thawed, drained, and moisture pressed out
  • juice of 1 lemon
  • 1 clove garlic
  • salt to taste
  • pepper to taste
  • 1/4 C soy Parmesan (I used "shaker" style)
  • 1/2 C artichoke hearts (I used canned, not marinated)
1. Preheat the oven to 350. Place all above ingredients in a food processor. Pulse about 15 times, or until fairly smooth. 
2. Pour the contents in a small casserole dish. Place in oven and bake 15 mins, or until the edges begin to brown slightly. Serve immediately, or for a thicker dip, make ahead and reheat in oven or microwave. 


Kitchen Notes: Rachel's original recipe called for 5 oz kale and 5 oz spinach; I think this would be super tasty, but I didn't have any on hand. It also calls for a slice of lemon (I like a strong lemon flavor) and 1/4 more Parmesan. I limited the amount of soy Parmesan for my attempt at it because the soy Parm I have is very granular and I didn't want the dip to have a gritty texture.


Verdict? I was seriously impressed with how similar to the real thing this tasted! You could easily fool someone into thinking this was dairy, it has all the richness, texture, and creamy zing of the full-fat version. A total keeper. Fresh out of the oven, it's a bit runny, but reheated it's the exact texture of the traditional version. The spinach flavor is quite assertive--it would be milder with fresh spinach. I might bump up the artichoke ratio a bit. I've been serving it as a sandwich spread, as a topping for breakfast English muffins and with pita. I'm super excited about this recipe!

    Sunday, December 11, 2011

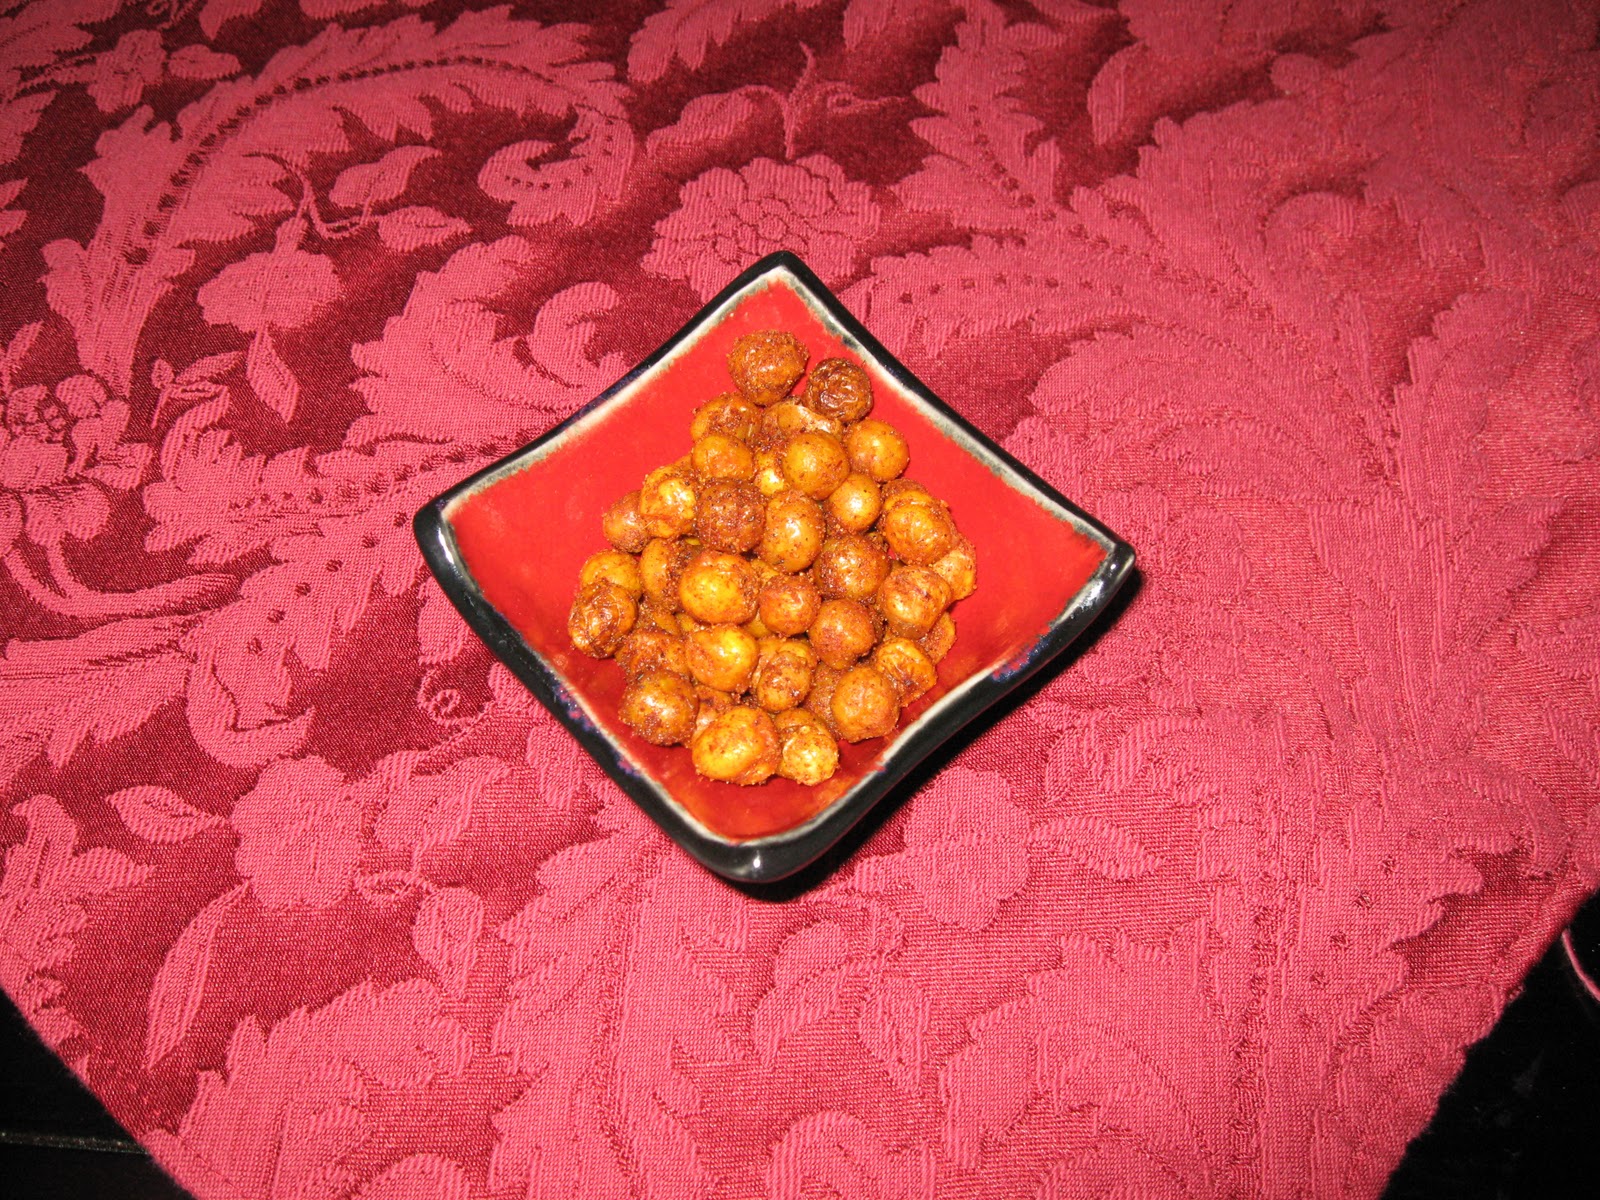
    A Trio of: Party Snacks. Oven-Fried Cajun Chickpeas

     This recipe comes with 2 warnings: 1) Prepare to become addicted to this tiny treats; 2) Symptoms of this addiction include a tongue made raw by crunchy chickpea bits and cajun heat, AKA a condition known as "Cap'n Crunch Tongue".

    I've been quiet with blogging as I've been busy preparing for a Christmas party that we hosted last night. Since (ehem!) I had to focus so many efforts on housecleaning, I wanted to enjoy experimenting with simple, yummy party foods.

    Two restaurants in town feature a little fried chickpea appetizer, both featuring smoky paprika seasoning. The fried chickpeas at Radio Maria and Carmon's Bistro for me, frequently overshadow the main course. After reading a lot of reviews that fried chickpeas made an easy, crowd pleasing appetizer, I figured I'd give it a go. Since every recipe I looked up stated they needed to be made more or less immediately before serving, and I didn't want to mess with frying oil in a party dress, I looked for an alternative. Steamy Kitchen offered up this recipe, which I followed more or less as directed. As an added benefit, I got to use my new bottle of Dinosaur Bar-B-Que Cajun Foreplay Spice Rub and a new baking pan designed to make oven fried foods crispier. Here are pictures of them:

    And the pan:


    Cajun Oven-Fried Chickpeas
    • 2 cans chickpeas
    • 1 Tbsp olive oil
    • Cajun seasoning, or other spice blend to taste (I used 2-3 Tbsp)
    • salt to taste
    1. Preheat the oven to 400, 325 if using convection. Rinse and drain the chickpeas.
    2. Line a baking pan with paper towels. Pour the drained chickpeas on the towel in single layer and place a paper towel on top. Let sit for 10 mins.
    3. After 10 mins, rub the palm on your hand on the top paper towel to remove the outer skins of the chickpeas. Discard the skins that remove easily.
    4. Dispose of paper towels. Pour chickpeas in a bowl. Add the olive oil, and stir until the chickpeas are well coated. 
    5. Return the chickpeas back to the baking pan in a single layer. Cook for 20 mins, stir. Cook for about 20 mins more, or until chickpeas are crispy.
    6. Pour chickpeas in a bowl, gradually adding/mixing in salt and seasoning to desired flavor. Serve immediately. 

    Kitchen Notes: These will store for a day or so, but some crispness is lost. I think these would be excellent on a salad.
    Verdict? It's a good thing that this blog is written, rather than spoken since my tongue is so sore from eating too many of these. These are almost as good as the fried ones, but easier to make, and possibly healthier. I'm really excited to make these again and again and I think they'll be a fabulous substitute for a lot of commercial salty snacks.


    Sunday, December 4, 2011

    Berry Chocolate Turnovers

    I'm making these for a Christmas party that I'm hosting. Due to time constraints and a tiny kitchen, I don't want to mess with a lot of ingredients, but I still want to feed my guests, so I thought up this recipe. it's a five ingredient dessert.


    In August, I declared a moratorium on puff pastry when I made Apple Turnover Squares, but it's time to lift the ban. It's been a long time since I sang the praises of puff pastry, so I figure I owe it one.

    With this recipe, I baked a few as test pastry and I've prepared and frozen the others to be baked next Saturday. This recipe makes a bit more chocolate than you'll need, so have a plan for the extra.

    Since it 'tis the season, I listened to Pandora's Indie Holiday station.

    Berry Chocolate Turnovers (makes about 8 mini-Turnovers)
    • 1 package puff pastry sheets, thawed (I used Pepperidge Farm)
    • 6 oz semi-sweet chocolate chips
    • 1/2 tsp vanilla extract
    • 1 Tbsp milk
    • good quality berry preserves 
    1. Preheat the oven to 400. Roll out the thawed puff pastry, 1 sheet at a time, on a non-stick surface. If it's a rectangular sheet of pastry, lay it so that the long way is left-to-right.  
    2. In a double boiler, or in a small saucepan set into a saucepan of boiling water, melt together the chocolate, vanilla extract and milk over medium heat and stir until smooth. When all the chocolate mixture is melted, reduce heat to low and continue to stir occasionally.
    3. Cut the puff pastry into 4 2in strips (for a 9 x 9 in sheet of pastry--You'll have a thin strip leftover, be sure to save it to fill in any oozing filling)
    4. On each strip, smear a small amount (1/2 tsp) preserves in the center of the bottom of the strip, smearing about 1/4 way up the strip, taking care to avoid the edges.
    5. Spoon about 1 scant tsp chocolate mixture in the same pattern as the preserves. 
    6. Fold each strip into triangles, pinching around the edges to seal. 
    7. Place each triangle on a greased cookie sheet. Bake for 15-20 mins or until golden brown. Serve hot or at room temperature. 

    Kitchen Notes: Because this recipe uses so few ingredients, it's important to use decent quality chocolate chips and preserves. I used  3 berry preserve that featured black currants, raspberries and strawberries. If you don't have a double boiler, a small saucepan set into a slightly larger saucepan with boiling water works fine, however, be careful not to 1) splash yourself with the hot water; 2) allow the water to splash in the smaller pan as it will seize your chocolate. This recipe benefits from some photo explanation, so please see below:
                                                                    Adding the filling...

                                                                   Making triangles...

                                                                              Keep going!

    Verdict? Great as a quickie dessert. I love that these are tiny. Since they are very rich, a mini-turnover is the perfect size. Have fun experimenting with different flavors.


    Thursday, October 6, 2011

    Caramelized Onion-Spinach Hummus

    This recipe is dedicated to my friend Carrie, who has eagerly been requesting it.
    My co-op recently started churning out caramelized onion & spinach hummus. Some friends recently brought it to a picnic. It was good stuff, it sort of tasted like a less decadent version of spinach artichoke dip (even though it has no artichoke), so I thought I'd try to make it myself.
    Caramelized Onion-Spinach Hummus (makes about 2 C)
    • 1 can chick peas, drained
    • 1 heaping Tbsp tahini
    • 1 clove garlic
    • juice of 1 lemon
    • 1/3 C onion, chopped
    • 2 C raw spinach, loosely packed 
    • vegetable oil
    • olive oil
    1. In a food processor, puree the chick peas, tahini, garlic, lemon juice, and a bit of salt and pepper until smooth. It will be a bit dry--that's OK at this point.
    2. Heat about 2 Tbsp vegetable oil in a frying pan at medium high heat. Begin sauteeing the onions, stirring frequently. When the onions begin to brown, turn the heat down, continue to caramelize for another 5-10 mins. Turn off the heat and set aside.
    3. Start some water boiling for the spinach, cook the spinach for about 2 mins or until the leaves are wilted. Drain the spinach.
    4. Add the caramelized onion, including the oil drippings from the pan, and spinach to the chickpea mixture. Process until smooth. If too dry, add a drizzle of olive oil.
    5. Add additional salt & pepper if desired. If underseasoned, add paprika or cumin. 


    Kitchen Notes: This hummus is a beautiful bright green shade the day it's made. It dulls to a more muted green as it sits.

    Verdict? This didn't taste a thing like the co-op's hummus, but it was pretty delicious. The caramelized onion flavor is a welcomed hummus variation, and this is a quick, easy way to get a bit more spinach in your diet.

    Tuesday, September 27, 2011

    Vegan Fried Green Tomatoes with Creamy Tomatillo Salsa

    ...with bonus fried pickles! Monday marked day 2 of vegan week. Here's a reminder. Monday, I ate the following:
    • almond milk yogurt
    • to drink: coffee, seltzer, coke, & water
    • vegan chocolate cake**
    • vegetable pizza*
    • pepita-cranberry snack mix
    • campanelle with garlicky broccoli**
    *exempt leftover item that would spoil during vegan week if not eaten
    **recipe to follow

    This recipe was especially challenging for me. My husband and I had purchased some green tomatoes at the coop before vegan week with the intention of frying them. This was challenging because I had never made fried green tomatoes, and I wasn't sure how to compensate for the egg bath or buttermilk bath I had seen in most fried green tomato recipes.


    I used the Dinosaur Bar-B-Que An American Roadhouse for guidance on prepping the tomatoes, but the recipe is my own. I searched online for a vegan buttermilk substitute, and the general consensus is 1 C soy milk with 1 Tbsp lemon juice or vinegar, allowed to sit for 10 mins. The tomatillo recipe comes from Kevin at Closet Cooking, however the adaption into a creamy version is my own. Here we go!

    Creamy Tomatillo Sauce (makes about 1 1/2 C--try to make in advance)
    • 3/4 lb tomatillos, husked
    • 2 jalapenos, stemmed and sliced in half longways
    • 1/2 med-large onion, cut into 8 wedges
    • 2 cloves garlic
    • juice & zest of 1 lime
    •  1/2 C cilantro
    • salt to taste
    • pepper to taste
    • 4 oz soy cream cheese
    1. Put the broiler on high. Arrange the tomatillos, jalapenos (skin side up), and onion in a single layer on a baking sheet. 
    2. Broil until the jalapenos are darkened, and the tomatillos blackened all over. The tomatillos release a lot of juices, be careful when removing from oven. 
    3. In a food processor, place the tomatillos, jalapenos, onions, garlic, lime juice and zest, and cilantro and mix until it's reached the desired consistency. Add a bit of salt and pepper and adjust as needed.
    4. Remove half of the tomatillo sauce and save for another recipe. Add the soy cream cheese and pulse til smooth. Refrigerate the sauce until ready to use.

    Kitchen Notes: Kevin's original recipe called for 1lb tomatillos. I only had 3/4lb, so I reflected that here. I was concerned that the flavor of the sauce would be very charred tasting, but it isn't. I needed to remove the jalapenos before the tomatillos. I use Tofutti brand Better Than Cream Cheese.

                                                                      Waiting for the oven

                                                                 Before Cream Cheese...

                                                                 And After!

    Vegan Fried Green Tomatoes (serves 3)
    •  3 green tomatoes
    • 3/4 C soy buttermilk (see instructions above)
    • 1/2 C cornmeal
    • 1 tsp Old Bay seasoning (or more, or less to taste), plus extra
    • 1 tsp chili powder (or more, or less to taste)
    • pepper to taste
    • peanut oil 
    1. Slice the tomatoes into 1/2 in slices. Blot on paper towels to drain and dry out the tomatoes a bit.
    2. Begin heating the peanut oil to 350 degrees. You'll need at least 1/2 inch of oil for a 9 inch heavy skillet. Sprinkle a bit of Old Bay seasoning on each slice of tomato, each side. 
    3. Mix together the corn meal, Old Bay, chili, and pepper in a large bowl. 
    4.. Set up a work station: buttermilk, bread, fry, drain, warm. Dip a slice of tomato in buttermilk, shaking off excess. Next, heavily coat the tomato slice in the corn meal mixture. 
    5. Fry the tomato 2-3 mins on each side. Several tomatoes can be cooked at once, but don't crowd the pan. 
    6. Drain the tomatoes on a paper towel, and keep warm in low oven. 
    7. Continue frying tomatoes, but ensure that oil returns to 350 before adding more. Enjoy, enjoy, enjoy! 


    Kitchen Notes: The Dinosaur Bar B Que cookbook recommends breading the tomatoes then allowing them to sit in the fridge for 30 minutes.

    Verdict? Kevin's tomatillo sauce recipe was spot-on, I'll try to never buy commercial salsa verde again. The addition of the soy cream cheese made for an outstanding dip, but without the heaviness of cream based dips. The breading was delightful, but the tomatoes were not very crispy, but they were not soggy either. I'm exciting to make these again.

    Monday, September 26, 2011

    Pepita-Cranberry Snack Mix

    Reporting in from day 1 of vegan week. For a quick primer on vegan week, see previous blog entry Sunday I ate/drank the following:
    • tempeh sausage with grapes
    • coffee, tea, seltzer, water, coke, pumpkin beer
    • paneer-rice casserole*
    • vegan chocolate cake** with soy milk to drink
    • pepita-cranberry mix
    • chili-lime pistachios**
    • fried green tomatoes** with creamy tomatillo sauce**
    • And I sampled the following whilst cooking: tomatillo sauce, onion-pepper relish
    *exempt item (leftovers) due to the fact that it will have spoiled by the time vegan week is over
    **blog item to follow

    For vegan week, I am relying heavily on my trusted friends, Moosewood New Classics, Sundays at Moosewood Restaurant and Moosewood Restaurant Cooking for Health. This particular recipe comes from Moosewood Restaurant Cooking for Health with a few adaptations from me.


    Pepita-Cranberry Snack Mix (makes about 2 C)
    • 1 1/2 C raw pepitas
    • 1 Tbsp soy sauce
    • 1 tsp canola oil
    • 1/2 tsp dried thyme
    • 1/4 tsp chili powder
    • 3/4 C dried cranberries
    1. Preheat the oven to 375 degrees. Place pepitas on a baking sheet in a single layer. Toast for about 7 min, or until they begin to darken. 
    2. While the pepitas are toasting, whisk together the soy sauce, oil, thyme, and chili powder.
    3. Remove the seeds from the oven, leaving the oven on. While on the baking sheet, drizzle the soy sauce mixture over the seeds and stir until coated. 
    4. Place back in the oven and cook for 2-3 mins, watching constantly. Don't let these guys burn!
    5. Remove from the oven and allow to cool. Once cool, add the cranberries and mix.

    Kitchen Notes: I was concerned that the amount of soy sauce in this recipe would be overwhelming, but it's not--it's fairly subtle. The original recipe called for chopping the cranberries, and I see the appeal, but I just didn't have the motivation to chop 'em up. This recipe offers a lot of flexibility, so have fun with the seasoning.

    Verdict? Addictive. Flavors subtle, but toasty, adequately seasoned, and yummy. Because I think there's a lot of opportunity for variation here, I doubt I'll make it exactly the same when I make it again. I'd look forward to any variations you recommend!

    Saturday, September 17, 2011

    Ingredient Elimination & A Trio of: Savory Pecans

    To close out my trio of roasted nuts, I break both my pattern of baking with almonds seasoned like hot beverages (see my previous posts for Chai Almonds and Hot Cocoa Almonds) and switch to pecans with a savory slant. In addition, I used my last egg white. Hurrah!

                                                            Packed up for a dinner party!

    This recipe is modified from Moosewood Restaurant New Classics. I tried the original recipe and was greeted with failure, the nuts burned, and had little flavor. With modifications it's a great bar snack. Enjoy!

    Savory Pecans (makes 2 C)
    • 2 C raw pecans
    • 1 egg white
    • 2 Tbsp Worcestershire sauce (I use a vegetarian version--see kitchen note below)
    • 2-3 tsp Old Bay seasoning
    • 1/2 tsp garlic powder
    • 1/2 tsp chili powder
    1. Preheat the oven to 350 degrees. Mix together the Worcestershire sauce, Old Bay seasoning, garlic powder, and chili powder until it forms a paste.
    2. In a separate bowl, lightly froth the egg white with a fork. Mix together with the Worcestershire sauce paste until combined.
    3. Pour the mixture over the pecans and stir until the nuts are well coated.
    4. Place the nuts on a lightly greased baking sheet in a single layer. Bake for 10 minutes, stir. Bake for another 5-10 minutes. Do not allow the coating to burn.

    Kitchen Notes: The original recipe calls for mixed nuts, but from experience the pecans especially shine in this recipe, so I prefer to use them exclusively. The original recipe also calls for a greater amount of Worcestershire sauce and a lesser amount of Old Bay. The veggie Worcestershire sauce I use is Wizard's brand, and I've always been happy with it. I've included a photo below.


    Verdict? I love the flavor of Old Bay, so I'm partial to these. As you can gather from the ingredient list, these are very salty but have a great flavor, and probably are no worse for you then commercially available salted nuts. Give them a try, and add seasonings that you adore.


    Tuesday, September 13, 2011

    Ingredient Elimination & A Trio of: Chai Almonds

    Here's my second installment in my trio of roasted nuts and my second attempt at getting rid of egg whites. I wanted to make a sugared almond with a little something extra. For this, I took a basic sugared almond recipe and added the seasoning from a Chai tea recipe from Sundays at Moosewood Restaurant. I was pleased with the result. Just a reminder, the first installment was hot cocoa almonds.
                                                     They smelled as awesome as you'd imagine!

    Chai Almonds (Makes 2 C)
    • 2 C raw almonds
    • 1 egg white
    • 1/2 C sugar
    • 1/2 tsp ground cinnamon
    • 1/2 tsp ground ginger
    • 10 ground cardamom pods
    • 1/2 tsp ground black pepper
    • 1/4 tsp ground cloves
    • 1/2 tsp ground coriander seeds
    • pinch salt
    1. Preheat the oven to 350. Combine the sugar with all the spices in a small bowl.
    2. Lightly froth the egg white. Pour over the almonds and combine until well mixed.
    3. Add the sugar mix to the almonds, combine until well-coated.
    4. On a lightly greased cookie sheet, spread the almonds into a single layer.
    5. Pop in the oven for 10 minutes, then stir. Pop in the oven for another 10 minutes, insuring it doesn't burn. Let cool before serving.
     Verdict? Very yummy twist on sugared almonds. I found that the spices were a bit more subtle than I'd like, so next time I'll bump up the ratio a bit. They are a bit addictive, so watch out!

    Sunday, September 11, 2011

    Ingredient Elimination & A Trio of: Hot Cocoa Almonds

    I've been making sugared almonds for a long time. I can't remember where I initially found a recipe, nor do I ever make them exactly the same way each time, but they are a go-to for me when I need to use up some egg whites.

    So,  since I had 3 egg whites from my Grown-Up Dirt Pudding, I decided to make a trio of roasted nuts, starting with Hot Cocoa Almonds, followed by Chai Spiced Almonds, and ending with Savory Pecans. I realized shortly after I planned out these recipes that the 1st two relate to hot beverages, and was disappointed with myself that I didn't transform the pecans into something coffee related, or given the emerging season, hot cider related. Oh well, next time.

    Hot Cocoa Almonds (makes 2 C)
    • 2 C raw almonds
    • 1 egg white, lightly beaten
    • 1 tsp vanilla extract
    • 1/2 C sugar
    • 1 Tbsp pure cocoa powder
    • 1 tsp cinnamon
    • pinch salt
    1. Preheat the oven to 350 F. Place the almonds in a medium mixing bowl. 
    2. In a small bowl, whisk together the egg white and the vanilla extract.
    3. In a separate bowl, mix together the sugar, cocoa powder, cinnamon, and salt.
    4. Pour the egg mixture over the almonds and mix until well coated.
    5. Add the sugar mixture to the almonds and mix until well coated.
    6. Lightly spray a baking sheet with oil. Spread the almonds into a single layer on the baking pan.
    7. Bake for 10 minutes. Stir, and bake for up to another 5 minutes, watching closely for the last few minutes--these burn easily.
                                          Almonds, sugar mix, and egg whites, ready to go

    Kitchen Note: This recipe will only be as good as the cocoa used. I used Dean & Deluca, with good result.


    Verdict? I was disappointed with the first bite, but the finish has a strong cocoa flavor that builds as you eat more and more almonds. I was very hesitant to use much cocoa for fear it would burn, but next time I will increase to 1.5 Tbsp. I'm definitely making this again, I'd like to make a spicy version with cayenne, as well as a version with toasted coconut. Yum.
     

    Sunday, September 4, 2011

    Harissa Hummus

    The weather cooperated long enough today that I was able to go on a picnic with a couple of friends. Yesterday, the temperature reached 100 degrees. While picnicking it was 72. I'm embarrassed to say I was cold.

    I had to work a bit today, so I didn't have times to make anything elaborate for the picnic (nor should picnic food BE elaborate, but I digress). I pulled together some hummus featuring the harissa I made yesterday.

                                                    Packed up and ready to go on a picnic

    Harissa Hummus (makes about 2 cups)
    • 1 can chick peas, drained (~15 oz )
    • 1 heaping Tbsp tahini
    • juice of 1 lemon
    • zest of 1/2 lemon
    • 1 Tbsp olive oil
    • 1 tsp toasted cumin seeds, ground
    • 1/4 tsp paprika
    • salt to taste
    • 2 tsp harissa (or more, or less)
    1. Combine all ingredients except for the harissa in a food processor, pulse til smooth.
    2. Taste, add additional seasonings if needed, add harissa. Blend again. Taste, adjust again as needed.


    Kitchen Notes: Don't try making this hummus without the harissa. It's too bland by itself, but well seasoned with it. For me, this hummus was initially very hot. When I served it later, it had mellowed significantly. If not serving immediately, taste again to ensure additional harissa is not needed.


    Verdict? A yummy, spicy hummus. For this however, I wish I had a milder version of the harissa. This hummus is very good, but it more or less tastes like spicy hummus, it doesn't have a lot of the harissa flavor. A milder harissa would really transform the hummus into something a bit more unique.